You will need three bowls (one for each color; purple, black, and green).
Then add ½ cup of white or clear glue to each bowl. Then add 1 – 2 drops of paint per bowl until you achieve the color you are going for.
The next few sentences are very important. PLEASE read them before proceeding.
You will need to concentrate on only one bowl at a time! In ONE bowl, add ¼ cup of liquid starch to the glue and stir together. You may need to add a bit more starch to get it to the consistency that you want.
Also remember that slime will have a wet feeling to it.As soon as the starch and glue combine, the mixture will start to form a ball immediately!
You will only need to stir for maybe a minute. Then remove the ball and start kneading the ball between your hands.
You will want to pass the ball back and forth, twist it around your fingers. If you still have starch left in the bowl, keep dipping the ball back into the starch until all of it is absorbed. This will take about 2 – 3 minutes.
The more you play with it, the more your slime will slowly unstick it’s self from your hands. You can then start playing with it like taffy. Stretch it in different directions for 3 – 4 minutes. Then put that slime ball back into the bowl then start the process all over again for the other two colors.
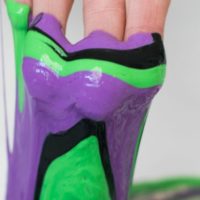
Once you are done making all of the colors, line up each of the colors next to each other and then repeat the color pattern until you are all done.Then start slowly mixing the colors together to create the Maleficent Slime colors and designs that you want!
Make sure to pin this now so you'll have it for later so you can make Maleficent Slime together!